|
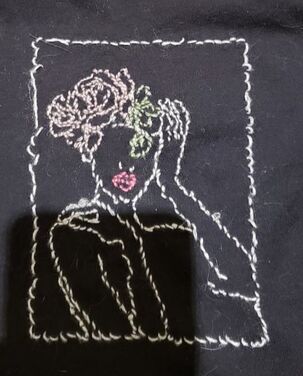
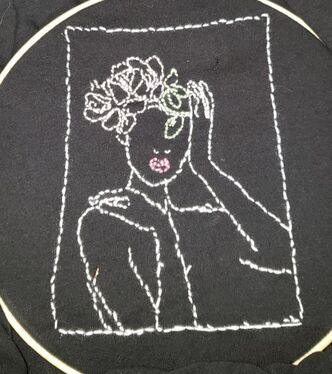
Hello all, and welcome back to my blog! This is my final learning project post. It has been a journey, that is for sure. I really enjoyed this project and all of the fun things I learned how to do with embroidery. The criteria for this assignment was to learn a new skill, practice it every week and then make blog posts based on our progress. I had started embroidery before this class but I had only done a couple small projects. I hadn't really learned any new skills, just the basics. I started here with my first learning project post. It was a fairly small post, just sharing the first resource that I would be using to begin my journey. It was a YouTube video about the basic stitches for embroidery beginners, which is exactly what I was! My next post was where it all began. I titled it "Project One". In this post I showed my progress embroidery a Volkswagon van with cute flowers on top. For this project I used my basic back stitch that I had learned in my first week and then I incorporated the lazy daisy stitch that I had learned from a YouTube video linked here. The photo below is the final product for that week. I am really happy with the way it turned out! 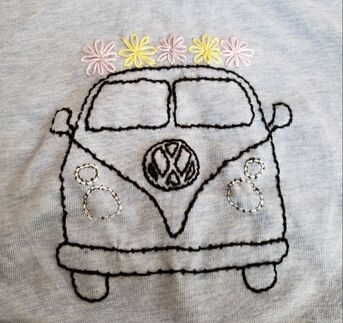 The next project was not as complex as some of my other ones. I will admit I was feeling super overwhelmed that week being in two spring classes and I had a massive assignment due in my other class. But I still wanted to produce something I could talk about for my blog. I titled it "Embroidering Memes". Basically, I had the idea to embroider one of my favorite memes onto a pair of jeans. I did this because the meme is "you're cute jeans" so I thought it would be fitting to put that onto a pair of jeans! I used a simple back stitch for this project, below is the photo of the end result. All of my friends wanted me to do the same thing to their jeans because they are all familiar with the meme as well! 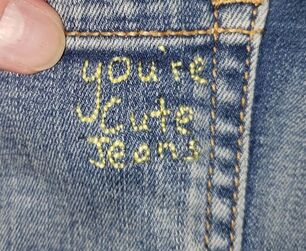 Our next blog post counted as our post for our learning project blog and our regular EDTC 300 blog. We had to use a new technological tool to show our progress in our learning project. I titled it "New Tools, New Embroidery". I had chosen to use Adobe Spark to display my progress for this week. I found it super user friendly, and I made a super cute video to show my embroidery! Below is the video I created for that weeks submission. I used a simple back stitch for the stem of the sunflower, the lazy daisy stitch for the petals themselves and I learned how to do a french knot stitch for the seeds in the middle with this video linked here. My next blog post was my hardest one yet. I struggled so much throughout the week with it that I wanted to quit. I saw a video on TikTok where this girl traced her pattern onto a piece of paper, pinned it to her shirt and then embroidered through the paper so she could follow her design. Once she was done, she wet the paper and peeled it off, revealing her design. I thought it would be a super cool idea for a new project and potentially a new way to embroider! My design looked so good on the paper... until I started peeling it off. All of my stitches became super loose and started detaching. I was so frustrated!!! I started doing research and discovered a specific type of paper that actually dissolves when it comes into contact with water. I immediately ordered it and attempted my design again. The second time around I was a lot more pleased with the outcome. There was only 2 or 3 loose stitches instead of my whole design falling apart. The photos below are both my attempts. The one on the left is the first attempt that I was so disappointed with and the photo on the right was my second attempt. When you look at them side by side you can clearly see which one turned out better!
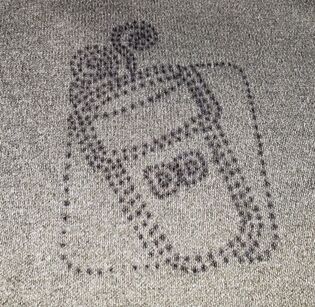
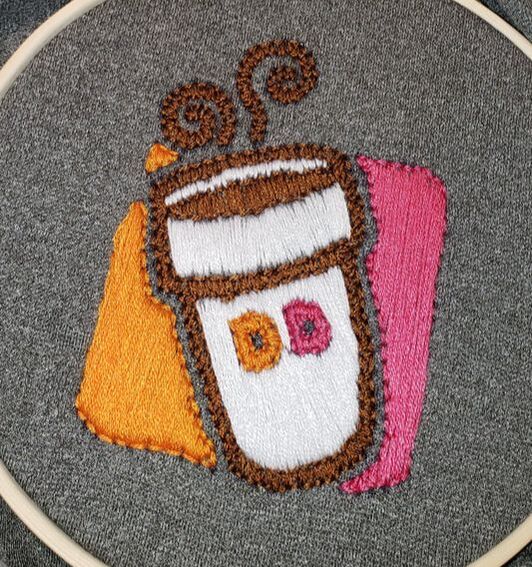
For my final project I wanted to do something bigger, and more challenging. I also really love Dunkin Donuts so I thought that would be fitting! I found the logo online and bought a plain grey hoody and began. I traced my design onto paper, poked holes through it all along the outline and then pinned it to my shirt. After that, I used a fine tip marker to put dots onto my sweater so I had an outline to follow. Then it was time to start embroidering. I started with the outline, which didn't take too long. The sweater I purchased was really thick material so it was super complicated to poke the needle through. After the outline was completed, I wanted to fill in all the spots with colour, just like the logo. I had to learn how to do what is called a satin stitch and I learned it from a YouTube video linked here. The satin stitch is a hard one to master because you have to make sure you're pulling your floss tight enough that once the stitch is through it stays tight and doesn't become loose. This was extremely time consuming. It took me a full week to complete this project, but I am happy with the final outcome!
This project really encouraged me to keep practicing my embroidery and improve my skills each and every week. I thought it was a really unique idea for a class assignment because I was actually working on something each week that I truly enjoyed. I plan to continue my embroidery, as my family and friends are requesting some designs on their own t-shirts and jeans! The positive feedback I received every week from my peers was also encouraging. Overall, I really enjoyed this assignment and I would encourage others to take this class so they can not only learn new technological skills but also a new skill of their choosing! If you would like to keep seeing my progress with embroidery you can follow my Instagram account called "haileysembroidery".
0 Comments
Leave a Reply. |